The following steps are only for installing or updating the UIFlow firmware on the M5Stamp S3.
If you havent already downloaded M5Burner, visit the M5Stack Download Page. and scroll down to the M5Birner section and then click on the link for the Operating system your host computer is using.
M5Burner can be fussy about where it installed to (may not work). On OSX (Apple) based computers these means that M5Burner need to be placed in the applications folder.
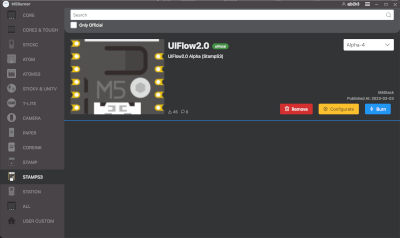
Once its in the correct location clicking on the icon will launch M5burner which will display a screen similure to the one below.
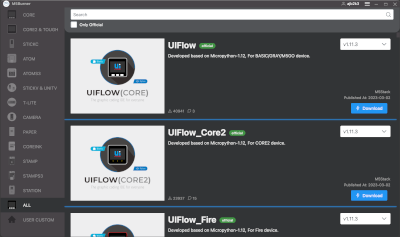
M5Stack compatable firmwares are grouped together by the device they are built to run on and you can sort the fimware selection to specific devices by clicking on the device icon in the right hand side menu.
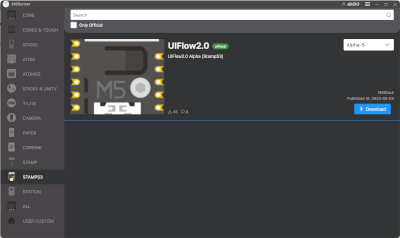
Clicking on the device icon for the M5StampC3 only show one firmware option which is an alpha for UIFlow 2.
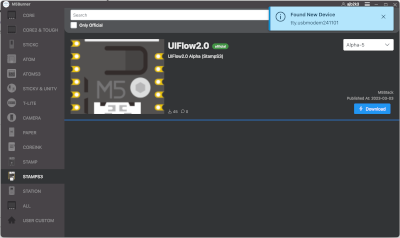
To install the firmware on an S3 Based device you first plug one end of the USB>USBC cable into a computer port and then while holding the button on the front of the M5StampS3, Plug the USBC end into the M5Stamp S3. If you have time the button press correct, you will see a message pop up in the top right showing that the M5StampS3 has been detected at the port adress given in the box (see Image)
Next step is to bind the M5Stamp to your M5Stack account. To log into your M5Stack account, you use the same username and password you used for the community forum found at https://community.m5stack.com
Next click on the dropdown box on the right to select a firmware forum and then click the download button to save the firmware to the computer. When the firmware has finished downloading the "download" button will be replaced with the three buttons Remove, Configure and burn.
Click on the "Burn" button and a new window will pop up with the options Erase and Burn.
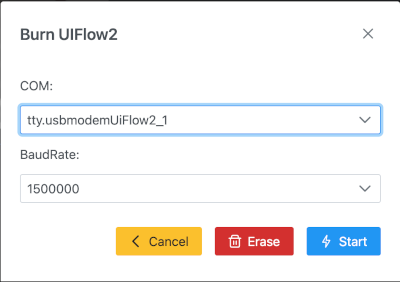
Select the port that the was in the blue box and then click on the erase button. Once M5Burner has finished erasing the old firmware, you will be asked to bind the M5StampC3 to your accound.
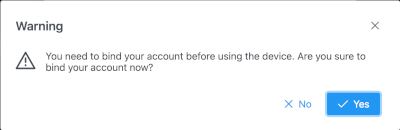
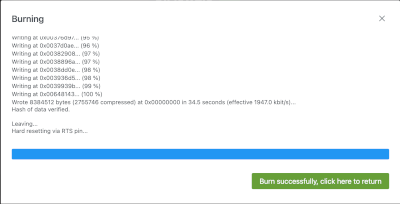
Click yes and you will be shown the M.A.C address that is printed on the lable and given the option to name the device. I recommend you take this change to name it something short and memorable instead of random characters. Click on Ok and M5Burner will either start burning the new firmware or return you to the main screen when you can click on the Burn button and then click on burn to write the firmware. Once the firmware is finished, wait for the message saying restarting and then close M5Burner.
Next open google chrome and visit UIFlow2.m5stack.com. On the bottom right of UIFlow will be a button that opens the device menu.
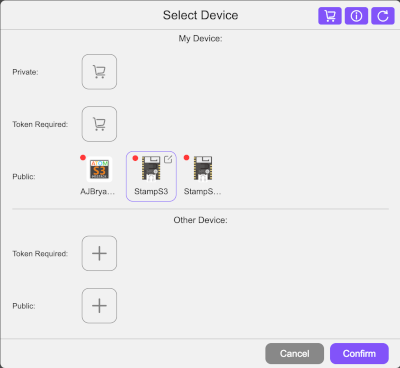
CLick on the device you just bound to you account in M5Burner, click on conform and now you can start controlling an S3 device in UIFlow2.